

Clutter happens to everyone. You bring in groceries, mail piles up, kids leave toys everywhere, and before you know it, your home feels cramped and messy. The problem is not that you have too much stuff. The problem is usually that you do not have good places to put it all.
Buying fancy storage systems can get expensive fast. But you do not need to spend a lot of money. Many of the best storage solutions come from things you already own or can buy cheaply at the hardware store. A little creativity goes a long way.
I have looked at ideas from trusted sources like Good Housekeeping, Apartment Therapy, Earth911, and real DIYers who have tested these projects in their own homes. These are not just pretty pictures. These are real solutions that people use every day.
Below are 20 DIY home storage ideas that actually make a difference. Some take ten minutes. Others might take a weekend. Pick what works for your space and your skill level. The goal is simple: make your home easier to live in.
20 DIY Home Storage Ideas

1. Turn Shoe Boxes into Drawer Dividers

Messy drawers are a headache. You open a drawer looking for one thing and end up digging through a pile of junk. The fix is simpler than you think. Grab some empty shoe boxes and turn them into drawer dividers.
Start by emptying the drawer completely. Wipe it clean. Sort your items into groups. Pens go together. Socks go together. Cords and chargers go together. Now take your shoe boxes and cut them down to the right height if they are too tall. Arrange them in the drawer like little compartments. Put each group of items into its own box.
You can leave the boxes plain, or you can cover them with contact paper to make them look nicer. This works for kitchen junk drawers, bedroom dressers, office desks, and bathroom vanities. The best part? It costs almost nothing. You probably already have the boxes.

2. Install Open Shelving on Empty Walls

Sometimes the storage you already have is just not enough. If your bathroom lacks under-sink storage or your kitchen has empty wall space, open shelving is a quick fix. All you need are a few shelves, some brackets, and a drill.
Measure your wall space. Pick shelves that fit. Mount them securely into the wall studs. Now you have a place to put towels, spices, books, or decorative baskets. The key is to keep it tidy. Do not just pile things up. Use matching baskets or jars to hold smaller items.
Open shelves also make a room look bigger because they do not block the floor like cabinets do. You can find affordable shelves at hardware stores for under twenty dollars each. This is one of those DIY home storage ideas that takes a few hours but makes a huge difference.

3. Repurpose Old Books into a Knife Caddy

If you have old hardcover books that you no longer read, do not throw them away. You can turn one into a unique knife caddy for your kitchen. Pick a thick hardback book. Open it to the middle. Trace the shape of your knives onto the pages.
Cut out the shapes with a craft knife, going through several pages at a time. Keep cutting until you have a hollow space deep enough to hold the blades. Glue the pages together with white glue so they stay in place. Now you have a place to store your kitchen knives that looks great on the counter.
This project takes some patience, but the result is a conversation piece that also saves drawer space. Just be careful with the craft knife and keep it away from kids.

4. Build a Hanging Rope Shelf from Scrap Wood

Got leftover plywood or boards from another project? You already have what you need for a hanging rope shelf. This is one of the simplest storage upgrades you can make. It adds function without taking up floor space. A rope shelf works in small apartments, bathrooms, kitchens, bedrooms, or entryways.
Here is how it works. Cut two equal pieces of plywood to your preferred size. Sand the edges smooth. Stack the boards and drill one hole in each corner. Cut four equal lengths of rope, about four to five feet long. Tie a knot at the end of each rope. Thread the rope through the bottom board. Tie another knot where you want the second shelf to sit. Repeat on all four corners. Adjust the tension so both shelves sit level.
Secure a heavy-duty ceiling hook into a joist and hang all four ropes from it. Compared to store-bought versions that can cost over $100, this build requires just plywood, rope, a drill, and basic hardware. Leave the wood raw for a minimal look, or stain it for warmth. This project costs almost nothing and turns scrap wood into usable storage.

5. Turn Mason Jars into Floating Storage

Mason jars are great for storage, but they take up space sitting on shelves or in cabinets. There is a clever way to make them even better. Affix the metal lid onto the underside of a cabinet and the jar becomes a floating storage compartment that hangs right below your cupboards.
For this project, you just need a drill, screws, hot glue, and mason jars with lids. Pre-drill a few holes in the flat lids. Use two or more screws for each lid so it stays secure. Hold the lid against the bottom of your cabinet where you want the jar to hang. Drill the screws through the holes into the wood.
In the kitchen, this is great for storing dry goods without crowding your pantry. In a workshop, it keeps nails and screws in a convenient spot. You can also secure the jars to wooden shelves for cute, space-saving storage anywhere.
For extra sturdiness, attach the lids to a wooden board first, then screw the whole plank to the underside of your cabinet. This simple hack makes use of empty space that usually goes to waste.

6. Repurpose a Plastic Container Lid into a Countertop Bin

Even a small mess on your countertop can make the whole room look chaotic. But you can fix that with something you probably already have in your recycling bin. Take a plastic container lid and turn it into a cute little catch-all bin.
This works with round or square lids. Use the lid as the base of your basket. Build sides around it using wire mesh, cardboard, or fabric. Match the shape of the container the lid originally covered. Small food container lids are perfect for a mini bin that can live on your counter holding keys, mail, or bathroom essentials. Larger lids make bigger baskets for other rooms.
Cardboard and fabric are great for disguising the lid and adding strength to the base. This project takes maybe an hour and costs nothing if you already have the materials. It is a simple way to reduce countertop clutter without buying anything new.

7. Use Wine Boxes for Shoe Storage

Shoes can take over your closet floor fast. But here is a clever solution that might already be in your recycling bin. The cardboard dividers inside wine boxes are perfect for keeping shoes neatly separated and easy to spot at a glance.
They work great for storing out-of-season shoes or those heels you only wear occasionally. Plus, they are stackable. You can slide them under the bed or pop them up in the attic. If you do not have a wine crate lying around, you can often pick them up for free from supermarkets, off-licences, or wine shops.
Each divider holds one pair of shoes, keeping them from getting scuffed or tangled. You can stack multiple boxes on top of each other. Label the end of each box so you know what is inside without pulling it out.
This is one of those DIY home storage ideas that costs nothing but makes a real difference in how tidy your closet looks.

8. Turn an Old Book into a Knife Caddy

If you have old hardcover books that you no longer read, do not throw them away. You can turn one into a unique knife caddy for your kitchen. Pick a thick hardback book. Open it to the middle. Trace the shape of your knives onto the pages.
Cut out the shapes with a craft knife, going through several pages at a time. Keep cutting until you have a hollow space deep enough to hold the blades. Glue the pages together with white glue so they stay in place. Now you have a place to store your kitchen knives that looks great on the counter.
This project takes some patience, but the result is a conversation piece that also saves drawer space. Just be careful with the craft knife and keep it away from kids. It works best with books that have at least 300 pages.
Thicker books give you more depth for larger knives. This is a great way to give an old book a second life while solving a storage problem.

9. Install Double Hanging Rods in Your Closet

If your closet feels cramped, you might not need more space. You just need to use the space you have better. Installing double hanging rods can literally double your hanging space. Put one rod at the normal height for shirts and jackets. Put a second rod lower down for pants or shorter items.
You can buy closet rod hardware at any home store for under twenty dollars. Mount the upper rod at about 80 inches from the floor. Mount the lower rod at about 40 inches. This gives you enough room for shirts on top and pants or skirts on the bottom.
This works best for items that are not too long. Dresses and long coats still need the full height. But for everyday clothes, double rods are a game-changer. You instantly get twice the hanging space without adding any square footage. It is one of the simplest DIY home storage ideas for anyone with a small closet.

10. Turn a Towel Bar into Scarf Storage

Scarves are tricky to store. They take up drawer space and get tangled easily. But there is a simple fix. Repurpose a wooden towel bar as a scarf holder. Attach it to a blank wall in your closet. Then loop each scarf over the bar.
This keeps your scarves visible and wrinkle-free. You can grab the one you want without digging through a pile. Towel bars come in different lengths, so you can pick one that fits your wall space. Mount it at eye level so you can see all your scarves at once.
You can also use this trick for belts, necklaces, or ties. Anything that hangs works. It frees up drawer space and makes getting dressed faster.
This hack takes about fifteen minutes to install and costs less than twenty dollars for the bar. It is a small change that makes a big difference in how organized your closet feels.

11. Create a Charging Station from a Wooden Box

Phone chargers and cables always end up in a tangled mess. You reach for your phone, and three other cords come with it. A simple wooden box can fix all of that. Any small wooden box or decorative tray works. Just drill a few holes in the back or side for cords to pass through.
Run your charger cables through the holes so the connectors sit inside the box. Plug the other ends into a power strip hidden behind or under the box. Now you have a clean spot to charge phones, tablets, and headphones. Everything stays in one place. No more searching for a charger.
You can paint the box to match your decor. Stain it if you want a more natural look. This project costs next to nothing and keeps your countertops from looking like a mess of wires. It is one of those simple DIY home storage ideas that makes your home feel more organized in just a few minutes.

12. Add a Pegboard to Your Kitchen Wall

Kitchen cabinets can only hold so many pots and pans. But your wall is a blank canvas. A pegboard gives you flexible storage space. You can hang utensils, pots, pans, strainers, and even small baskets.
Mount the pegboard on an empty wall near your cooking area. Use the pegs and hooks that come with it to hang your items. The best part is that you can rearrange the hooks whenever you want. As your cooking tools change, your pegboard adapts.
This keeps your counters clear and makes it easier to grab what you need. You can find pegboard panels at hardware stores for around twenty dollars. Paint it to match your kitchen colors or leave it natural. This has been a favorite trick in kitchen design for years because it is cheap, easy, and very practical.

13. Use Empty Coffee Cans as Planter Storage

Old coffee cans are surprisingly useful. They are the perfect size to use as planter pots for small countertop plants. Drill a few small holes in the bottom for drainage. Use a bit of paint or a bit of washi tape to decorate the outside of the can.
These mini plant pots are great for herbs in your kitchen or small flowers on your windowsill. They use vertical space on your countertop while adding a bit of greenery to your home. The plants themselves can become a cute storage solution for small items like pens, makeup brushes, or kitchen tools.
The versatility makes coffee cans one of the easiest materials to repurpose for storage. You can also use them without plants to hold utensils, paintbrushes, or office supplies. This is a project you can finish in an afternoon that gives you storage and style.

14. Make a Hanging Basket from an Old Belt

Got a worn-out belt you do not wear anymore? You can turn it into a hanging wall basket. This works best with leather belts that are still sturdy. Turn the belt into a loop by fastening the buckle to the last hole. Attach the looped belt to the wall using a hook or strong nail.
Rest a small basket or bowl inside the belt loop. The belt holds the basket against the wall. This creates a cute hanging spot for keys, mail, or small plants. It uses vertical wall space that would otherwise sit empty.
This is a quick project that takes maybe five minutes. It looks interesting and gives you extra storage without taking up floor or counter space. If you do not have an old belt, you can often find cheap ones at thrift stores for a dollar or two.

15. Build a Simple Wall Mounted Magazine Rack

Magazines, mail, and papers always seem to pile up. A wall mounted magazine rack can keep them contained and visible. You can build one from a single piece of wood. Cut a piece of plywood into a rectangle about 12 inches wide and 18 inches tall.
Cut a slot diagonally across the front to hold your magazines. Sand everything smooth and paint or stain it. Mount it to the wall with screws. Now you have a designated spot for reading materials.
You can also buy ready-made wooden racks if you do not want to build one. Wall mounting is the key. It keeps the rack from becoming just another thing sitting on a table. You can customize the size to fit the magazines you read. This is a practical storage project that also adds visual interest to a room.

16. Repurpose an Old Ladder as a Towel Rack

A worn out wooden ladder does not have to be firewood. It can become a stylish towel rack. Lean the ladder against a wall in your bathroom, laundry room, or near your entryway. Drape towels, blankets, or coats over the rungs.
This adds rustic charm while giving you a place to hang things. No tools required. Just place the ladder where you need it. Make sure it is stable so it does not tip over.
You can often find old wooden ladders at flea markets, garage sales, or even in your own garage. Sand down any rough spots so it does not snag your towels. This is a great option for renters because you do not have to mount anything to the wall. It is portable and adds character to your space.

17. Create a Jar Lid Plant Holder

Plastic bottle caps and jar lids are easy to find. With a few simple steps, you can turn them into tiny planters for herbs and small flowers. Fill a lid with soil and plant a seed. Make a small hole in the lid for drainage if needed.
These mini planters are perfect for sunny window sills. They reuse materials that would otherwise end up in the trash. You can even paint the lids to match your decor.
This is a small project, but it is a great way to start growing a windowsill herb garden without spending money on pots. Just be careful not to overwater since there is not much soil to hold moisture. It works best with plants that do not need deep roots, like basil or chives.

18. Install a Curtain Rod Under Your Sink

The space under your kitchen or bathroom sink is often wasted. The pipes make it hard to organize. But a simple tension rod can fix that. Place a tension rod under the sink, right between the two cabinet walls.
Hang spray bottles, cleaning cloths, and small brushes from the rod. This frees up the floor of the cabinet for larger items like extra soap or paper towels. The tension rod is easy to install and requires no tools.
You can find tension rods at any home goods store for under ten dollars. This hack makes use of vertical space that would otherwise be empty. It keeps your cleaning supplies accessible and off the cabinet floor.

19. Attach Plastic Hooks Inside Your Kitchen Cabinets

Inside your kitchen cabinets, the side walls often go unused. Stick plastic hooks on the inside of your cabinet doors. These hooks can hold measuring spoons, oven mitts, or even small kitchen gadgets.
The hooks make use of forgotten space while keeping things within easy reach. Adhesive plastic hooks are cheap and easy to install. Just peel off the backing and stick them where you need them.
This is one of the easiest organizational hacks. It costs just a few dollars and takes seconds to install. You can use them in bathroom cabinets too for hair tools or cleaning brushes. It is a small change that helps keep your drawers from overflowing.

20. Upcycle Empty Toilet Paper Rolls to Tame Cords

Tangled cables are a common problem. But you can fix it with something you probably throw away every week. Toilet paper rolls are the perfect size to wrap cords around.
Cut a slit down the side of the roll. Wrap your cord around the roll and tuck the end through the slit to hold it in place. The roll keeps the cord from tangling with others. You can decorate the rolls or leave them plain.
This is a free solution to a frustrating problem. You can use paper towel rolls for longer cords. It takes seconds to do and makes a huge difference in how tidy your drawers and counters look. Plus, you are reusing something that would otherwise go in the trash.

Pros and Cons of DIY Home Storage
Before you jump into these projects, it helps to know what you are getting into. DIY storage has real benefits, but it also has some downsides.
Pros:
- Lower upfront cost. DIY projects are much cheaper than buying custom storage systems. Prices for a DIY closet system can range from $200 to $2,500. That is a lot less than hiring a professional.
- Quick installation. Most DIY storage projects can be finished in a weekend. You do not have to wait weeks for delivery or installation.
- Creative freedom. You can customize everything to fit your space and your style. No two homes are the same, and DIY lets you adapt.
- Emotional reward. There is a real sense of pride when you build something yourself. You look at it and know you made that.
Cons:
- Less durable. Cardboard boxes and repurposed materials do not last as long as store-bought options. They can wear out or get damaged by moisture.
- Limited protection. DIY storage might not keep your items safe from temperature changes or humidity. Delicate items like electronics or important papers need better protection.
- Hidden costs. Sometimes you end up spending more on tools and materials than you planned. A project that seemed cheap can add up.
- Time and effort. Not everyone has the time or patience for DIY. Some projects take longer than expected or require skills you might not have.
The bottom line, DIY storage is great for small projects and temporary solutions. For long-term, heavy-duty storage, you might want to buy something built to last.
Product Recommendations
Sometimes DIY is not enough. You need something built to last. Here are some highly-rated storage products from Amazon that work well for different parts of your home. These are popular for a reason.
Under-Sink Organizer
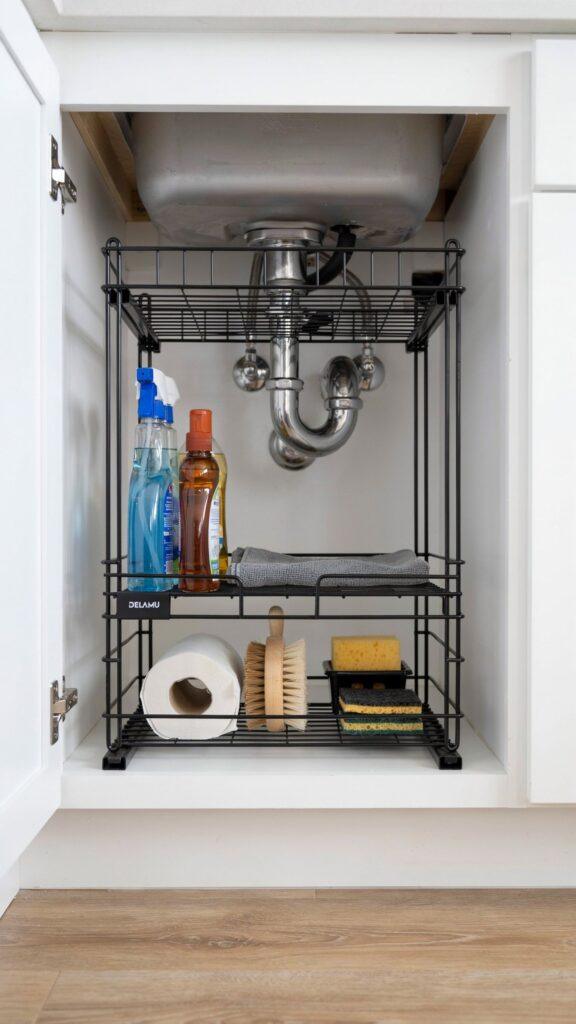
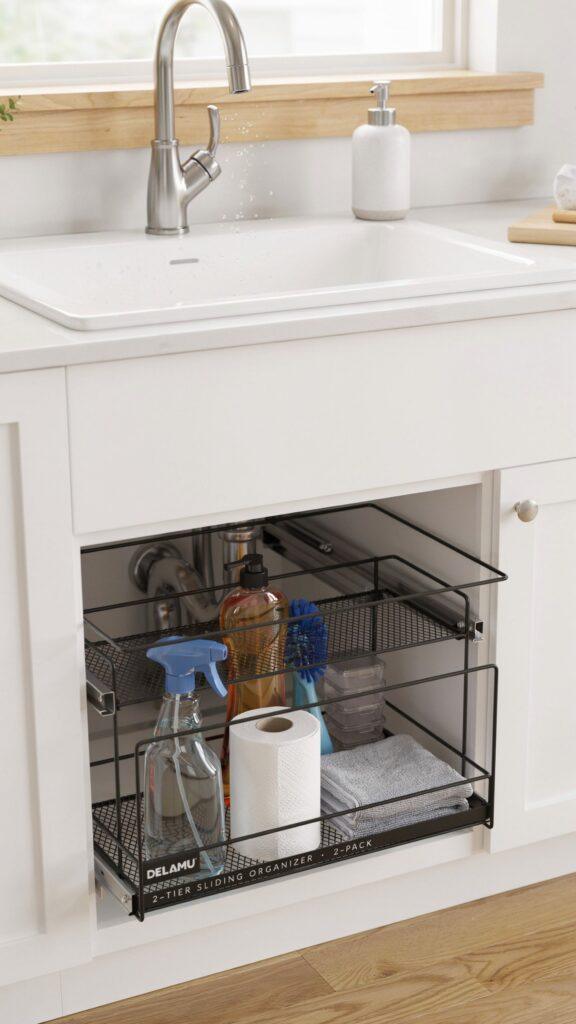
Delamu 2-Tier Under-Sink Organizer, 2-Pack
This sliding organizer fits neatly under your kitchen or bathroom sink. It has two sliding drawers that make it easy to reach items in the back. No more blindly fishing around behind bottles. The two-pack usually costs around $40 but can drop to about $28 on sale.
Closet Storage Baskets
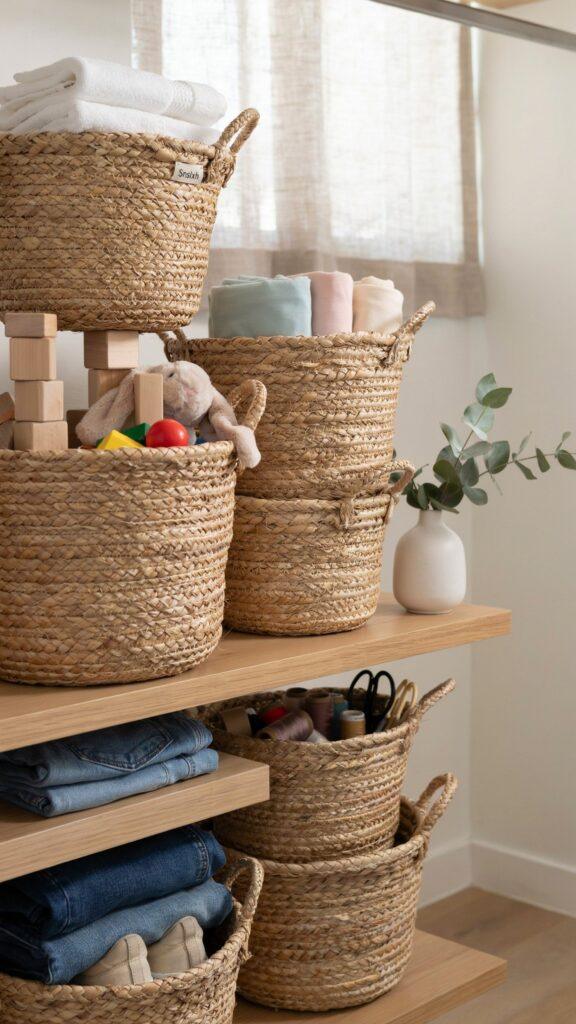
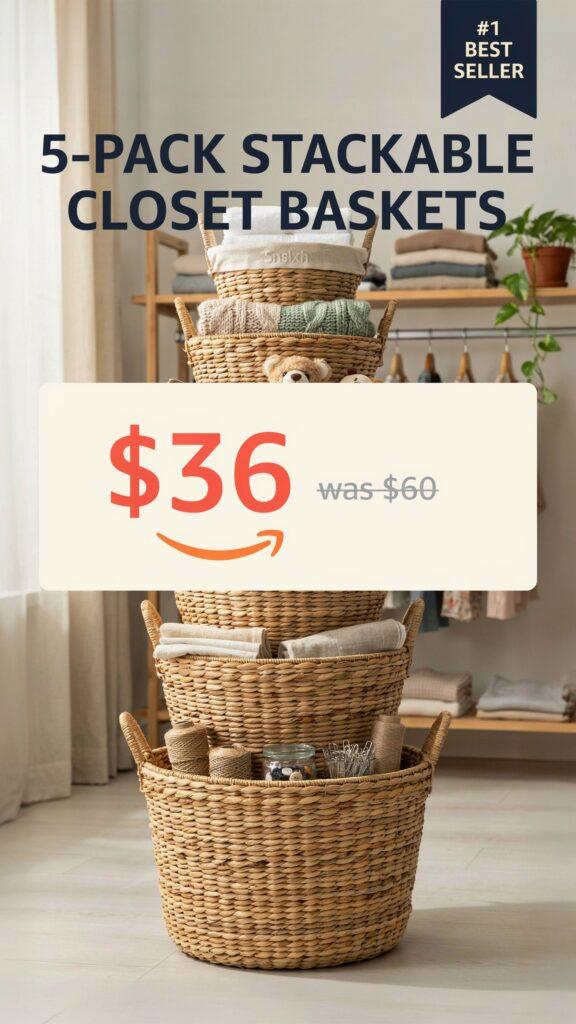
Snslxh 5-Pack Stackable Closet Storage Baskets
These are Amazon’s No. 1 best-selling storage baskets. They stack vertically to save space. You can use them for clothes, toys, linens, or craft supplies. The set of five costs about $36, down from $60.
Stackable Storage Bins
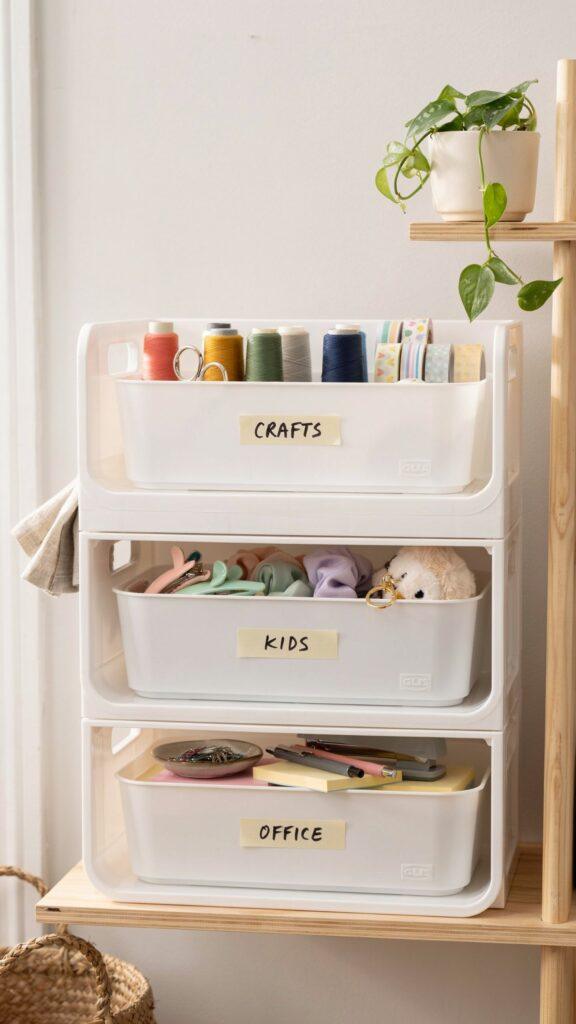
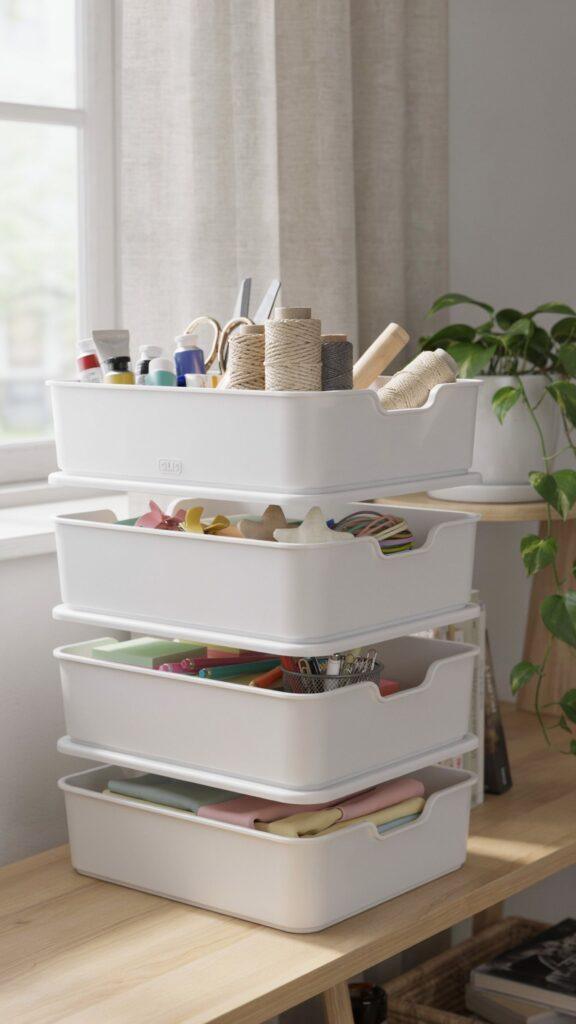
IKEA GLIS Series Stackable Bins
These compact bins are super affordable and stack securely on shelves. They work great for small items like craft supplies, kids’ accessories, or office supplies. They are a favorite among organization experts.
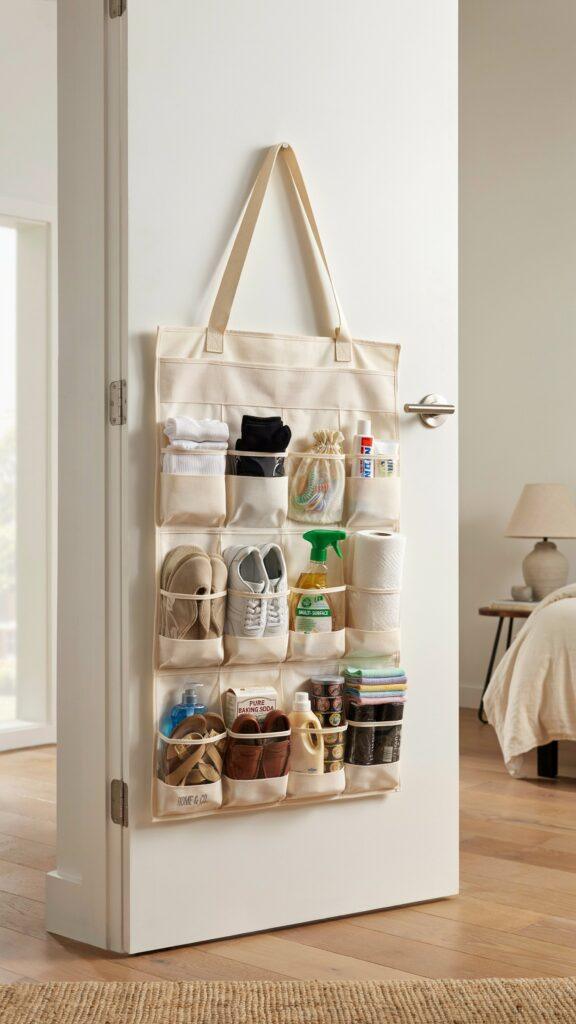
Over-the-Door Organizer

Simple Houseware Over-the-Door Organizer
This organizer hangs over any standard door. It gives you instant storage without drilling holes. Use it for shoes, cleaning supplies, pantry items, or bathroom essentials. It is versatile and easy to install.
Rolling Utility Cart
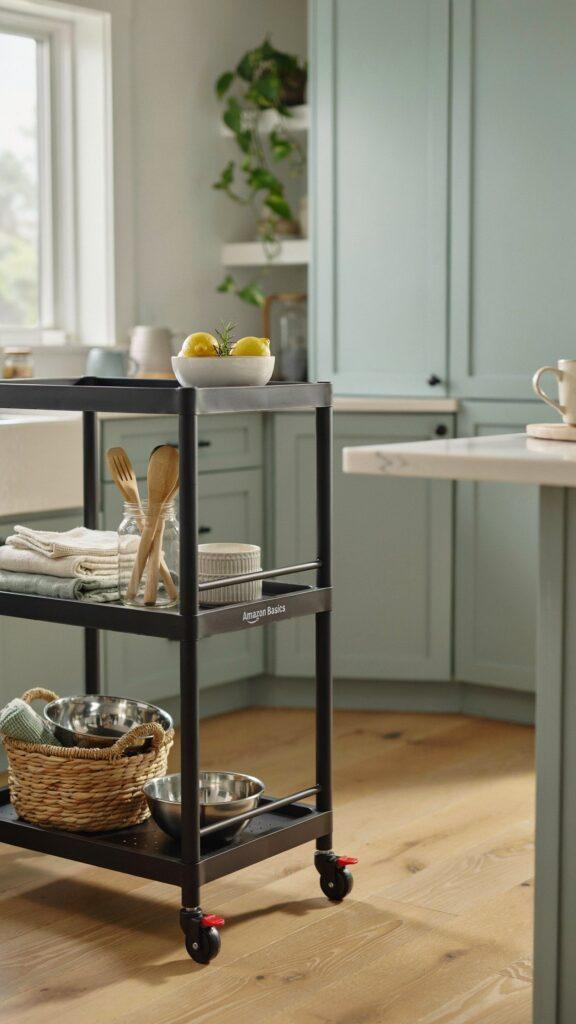
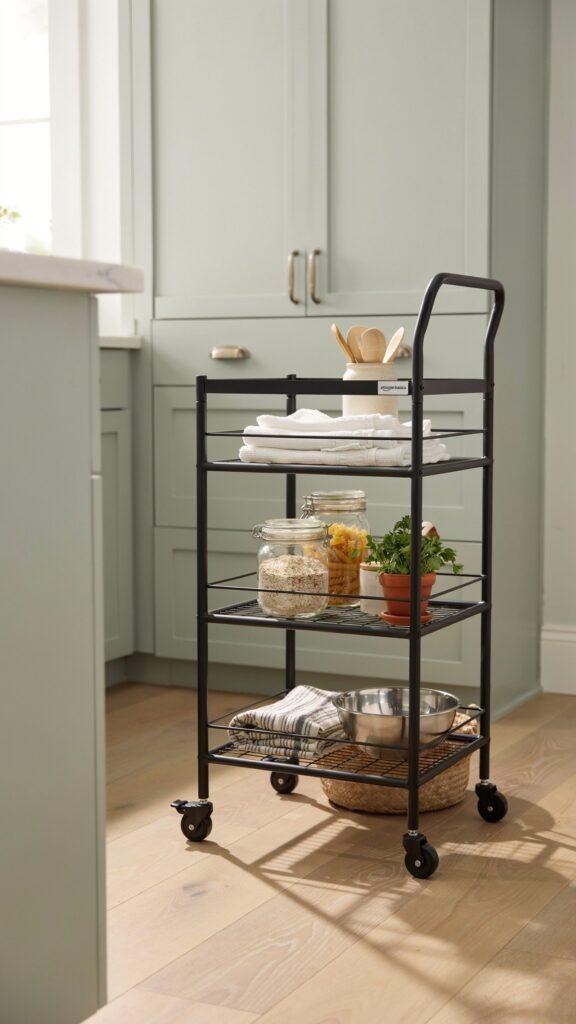
Amazon Basics 3-Tier Rolling Utility Cart
This cart is a professional organizer favorite. It rolls anywhere you need extra storage. Use it in the kitchen, bathroom, office, or garage. The three tiers give you plenty of shelf space.
Tips to Make These Ideas Work
- Start small. Pick one project and finish it before starting another. Trying to do everything at once leads to burnout.
- Make a plan first. Know where things will go before you start building. A clear plan saves time and frustration.
- Declutter before you organize. Get rid of things you do not need first. There is no point storing stuff you should throw away.
- Test before you commit. Try a storage solution for a few days before making it permanent. Make sure it actually works for you.
- Use vertical space. Walls, doors, and ceilings offer storage space that often goes unused.
- Label everything. Labels help everyone in the house know where things belong. It makes it easier to put things back.
Mistakes to Avoid
- Buying bins before you declutter. This is the number one mistake people make. You end up with bins full of stuff you do not need. Declutter first, then buy storage.
- Focusing on looks over function. Pretty storage is nice, but it needs to work. If it is hard to use, you will not use it.
- Over-organizing. Not everything needs a fancy system. Sometimes simple is better. You can go too far with decanting, labeling, and drawer dividers.
- Holding onto “just in case” items. If you have not used it in a year, let it go. Keeping things “just in case” just creates clutter.
- Copying what works for someone else. Every home is different. What works for your friend might not work for you. Adapt ideas to your space and your habits.
FAQs
Q: What is the cheapest DIY storage idea?
A: Using shoe boxes as drawer dividers or toilet paper rolls to tame cords costs nothing. You already have these items at home.
Q: How do I prevent moisture damage in DIY storage?
A: Avoid cardboard in damp areas like basements or bathrooms. Use plastic bins or sealed containers instead. Add a dehumidifier if moisture is a problem.
Q: What DIY storage projects are best for beginners?
A: Start with open shelving, mason jar storage, or tension rod organizers. These require basic tools and give quick results.
Q: How do I store things under the bed without damage?
A: Use plastic bins with lids to keep dust and moisture out. Make sure the bins are not too heavy to pull out easily.
Q: Do I need special tools for these projects?
A: Most projects need basic tools like a drill, screwdriver, hammer, and measuring tape. You can borrow tools from a neighbor or rent them from a hardware store.
Final Thoughts
Getting your home organized does not have to cost a fortune. These 20 DIY home storage ideas prove that you can create real solutions with things you already have or can buy cheaply. The key is to start small, make a plan, and only keep what you actually use.
Pick one idea from this list. Try it this weekend. See how it feels. Then try another one when you are ready. Before you know it, your home will feel more organized and easier to live in. You do not need a perfect system. You just need a system that works for you.
Reated post: