
If you’ve ever looked at a patch of yard and thought, “I’d love to grow vegetables but that dirt looks terrible,” you’re not alone. Raised bed gardening is the answer. You build a box, fill it with good soil, and suddenly you’re in control. No more rocky ground, no more digging through clay. It works on patios, small yards, even grass you don’t want to rip up.
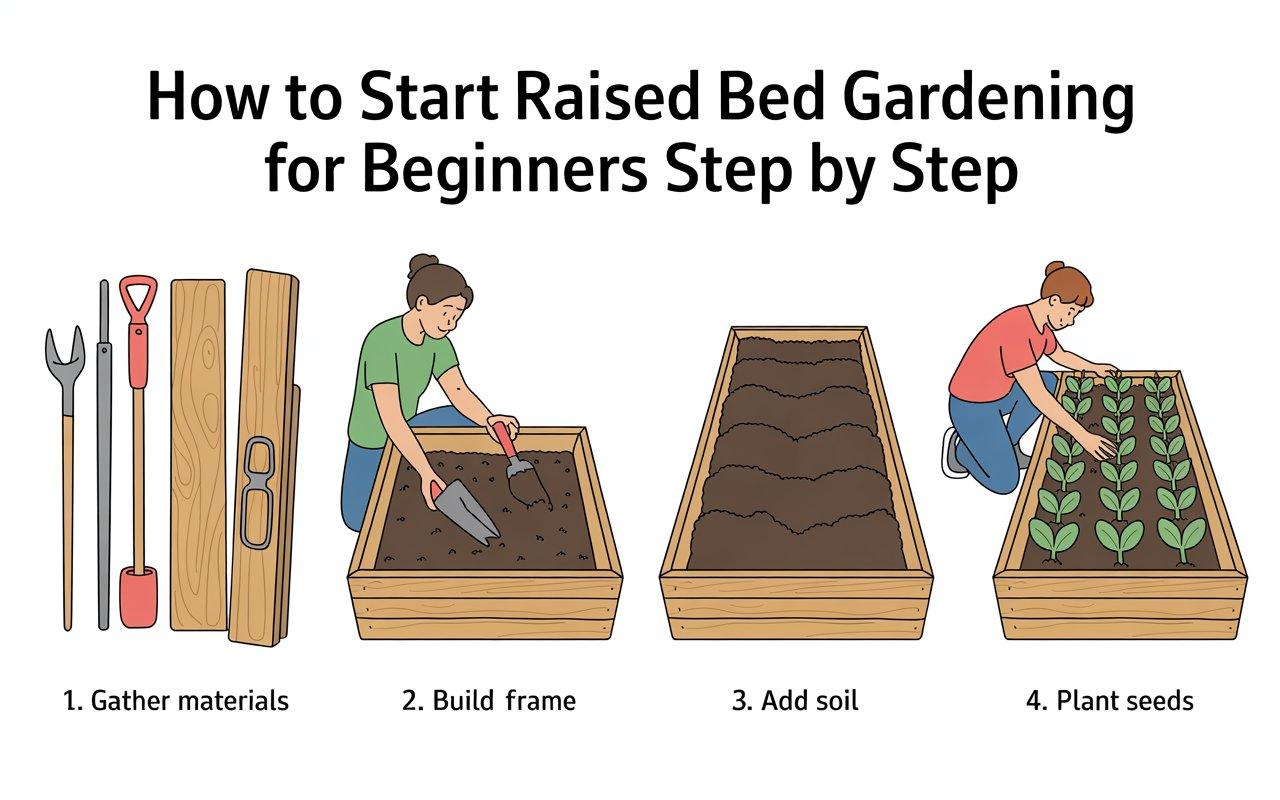
This guide walks you through exactly how to start raised bed gardening for beginners step by step. No fancy jargon. Just things you can actually do this weekend.

Here’s why it’s crucial for new gardeners.
Regular in-ground gardening can feel like a fight. Weeds pop up everywhere. Rain packs the soil down like concrete. And if your yard has bad dirt, you’re stuck trying to fix a huge area. Raised beds fix all that.
They drain better, warm up faster in spring, and let you stand or sit while you work (your back will thank you). Plus, you can put them anywhere that gets 6–8 hours of sun. Even beginners usually get a good harvest the first year.
Main Content: Detailed Steps
Follow these, and you’ll have a working raised bed garden in a weekend.
Step 1: Pick the Right Spot (Sun Matters Most)
")
Walk around your yard with a notepad. Look where the sun hits for most of the day. You need at least six hours of direct sunlight for vegetables like tomatoes, peppers, and beans. Leafy greens like lettuce can handle a little less.
Don’t put your bed under a big tree (roots will invade) or right next to a fence that blocks morning sun. Also think about water can you drag a hose to this spot easily? If you have to walk fifty feet every time, you’ll water less often. Keep it close to your house.
That way, you’ll actually check on your plants daily. Pick a spot you walk past often, like near the back door or along a path to the garage.
 1")
Step 2: Choose Your Bed Size and Material

Most beginners do well with a bed that’s 4 feet wide and 4 to 8 feet long. Why 4 feet wide? Because you can be reach the middle from either side without stepping into the bed.
Length doesn’t matter as much go as long as you want. For depth, aim for 12 to 18 inches. Carrots and potatoes need deeper soil, so 18 inches is safer. As for material, untreated cedar or redwood lasts several years without rotting fast. Avoid old railroad ties (they have chemicals).
A cheaper option is untreated pine it’s fine for a few seasons. You can also buy metal raised beds (corrugated steel) that look modern and last a long time. Just don’t use pressure-treated wood made before 2004 (older treatments had arsenic). 👉 Check price on Amazon.com

Step 3: Build or Buy – Keep It Simple

You don’t need to be a carpenter. The easiest path for a beginner is buying a snap-together metal or plastic bed kit. They cost around $50–$100 and come with instructions.
If you want to build your own, buy four boards, some screws, and corner brackets at the hardware store. Tell the lumber person you’re building a raised bed, and they’ll cut the wood for free. Assemble it on level ground. If your yard is sloped, don’t try to dig one side down.
Just level the bed by putting stones or bricks under the low edge. One last tip: lay cardboard or thick layers of newspaper at the bottom before adding soil. This kills grass and weeds underneath without chemicals. It’ll rot down over time and feed the worms.

Step 4: Fill With the Right Soil (Don’t Use Bagged Topsoil)
")
Here’s where beginners mess up. They buy cheap “topsoil” in bags, and their plants struggle. Topsoil from a hardware store is often heavy, full of clay, and has no nutrients. Instead, mix your own or buy raised bed mix.
A simple recipe: one-third compost (from a garden center or your own pile), one-third vermiculite or perlite (holds moisture and air), and one-third peat moss or coconut coir (keeps the soil fluffy). Mix it right in the bed. This blend costs more upfront but you won’t need to replace it just add compost each year.
If mixing sounds like work, look for a bag labeled “raised bed potting mix” at a real nursery, not a big box store. Fill your bed all the way to the top because the soil will settle a few inches after watering.
👉 Topsoil – Check price on Amazon.com
 1")
Step 5: Plant What You Actually Want to Eat

Don’t grow chard just because someone said it’s easy. Grow what you like. For first-timers, try these foolproof options: basil, cherry tomatoes, bush beans, radishes, lettuce, and zucchini. Radishes go from seed to harvest in 25 days, which feels amazing when you’re new.
Plant seeds at the depth written on the packet that’s not a suggestion. For tomatoes or peppers, buy small starter plants, not seeds. Check the plant tag for spacing. People often pack too many plants into a small bed. A 4×4 bed can hold maybe 2 tomatoes, 4 peppers, and some basil.
That’s it. Crowded plants get sick and make less food. Water gently after planting, and put down a thin layer of straw or shredded leaves around the plants. That keeps soil from splashing onto leaves and spreading disease.
small starter plants cherry tomatoes, bush beans, radishes

Step 6: Water the Right Way (No Sprinklers)
")
A sprinkler wastes water and wets the leaves, which can lead to mold. Instead, water at the soil level. Use a watering can with a rose attachment or a hose with a gentle spray nozzle. Aim for the base of each plant. The best time is early morning, before the sun gets hot.
That way, water soaks in before it evaporates. Evening watering works too, but wet leaves overnight can cause fungus. How much? Give your bed a slow, deep soak until water starts trickling out the bottom. Then don’t water again until the top two inches of soil feel dry to the touch.
Stick your finger in to check. This method trains roots to grow deep, making plants tougher during dry spells. A rain gauge is helpful too if nature gives you an inch of rain in a week, you can skip watering.
 2")
Step 7: Mulch Like a Pro

Mulch is just a blanket on top of your soil that does three big things: stops weeds, holds moisture, and keeps soil temperature steady. Good options for raised beds: straw (not hay hay has seeds), shredded leaves, grass clippings (dried first, not fresh), or untreated wood chips.
Spread a 2–3 inch layer around your plants, but leave a little bare circle right around each stem so the stem doesn’t rot. Mulch also prevents soil from splashing onto leaves when it rains, which stops many plant diseases. You’ll water less often because the sun isn’t baking the soil directly.
In winter, mulch protects any perennial plants you might have. Just don’t use dyed mulch from big box stores the dye adds nothing good for your vegetables.

Step 8: Feed Your Plants Without Overdoing It

Your raised bed starts with rich soil, but plants eat it up over time. You’ll need to add fertilizer every few weeks during the growing season. Look for a balanced organic fertilizer like 5-5-5 (those numbers mean nitrogen-phosphorus-potassium).
Follow the label amount more is not better. Too much nitrogen gives you giant leafy plants with almost no tomatoes or peppers. Liquid fertilizers like fish emulsion or compost tea work fast. Mix with water and pour around the roots. Granular fertilizers work slower but last longer.
A simple schedule: feed when you plant, then again when you see flowers forming, then once more a month later. If your compost is high quality, you might not need extra fertilizer at all. Watch your plants. Dark green leaves mean good. Yellow leaves mean feed them.

Step 9: Support Tall or Heavy Plants

Tomatoes, pole beans, cucumbers, and peas need something to climb or lean on. If you don’t give them support, they’ll sprawl on the ground, fruit will rot, and you’ll lose half your harvest. The simplest support is a tomato cage.
Put it over a small plant right after planting. For a whole bed of climbing plants, build a trellis. Hammer two 6-foot wooden stakes at each end of the bed. Staple wire mesh or nylon netting between them. Plant beans or cucumbers at the base, and they’ll climb on their own.
Another trick: put bamboo stakes next to each tomato and tie the main stem loosely with garden twine. Check ties often so you don’t strangle the stem as it thickens. Supporting plants early is easy. Waiting until they’re heavy and flopped over is a mess.
Olso you can read: Best Vegetables to Grow in Small Spaces

Step 10: Pull Weeds When They’re Tiny

Weeds are easiest to pull when they first sprout about the size of your pinky nail. At that stage, they slide right out with one finger. If you wait until they have thick roots, you’ll disturb your vegetable roots trying to yank them out.
Walk through your garden every couple of days. Spend five minutes just looking for tiny invaders. A stirrup hoe is a great tool for raised beds because it skims just under the soil surface, slicing off baby weeds without digging deep. And here’s a mindset shift: weeds aren’t failure.
They’re just plants growing where you don’t want them. Pull, toss them in a bucket, add to compost if they haven’t gone to seed. Stay consistent, and after a few weeks, weed seeds stop sprouting because you’ve removed the parents.

Step 11: Watch for Pests (But Don’t Panic)
 1")
You will see bugs. Most are harmless or even helpful. A few chewed holes in a leaf are fine. But when you see clusters of tiny aphids, holes in every leaf, or plants wilting for no reason, it’s time to act.
First, identify the pest. Squash bugs? Pick them off and drop in soapy water. Cabbage worms? Look for small green caterpillars under leaves. A strong blast of water from a hose knocks aphids off. For serious problems, use insecticidal soap or neem oil both are safe for vegetables.
Better yet, prevent pests from the start. Plant marigolds around your bed (bugs hate the smell). Use floating row covers (thin white fabric that lets sun and water through but blocks insects). And never spray chemicals labeled “non-selective” because they kill bees and good bugs too.
")
Step 12: Harvest Often to Get More Food

This is a secret many beginners miss. When you pick a zucchini, a bean, or a cherry tomato, the plant responds by making more. Leave a ripe pepper on the vine too long, and the plant thinks its job is done. So harvest early and often.
For leafy greens like lettuce or kale, take the outer leaves first and let the inner leaves keep growing. This gives you a continuous harvest for weeks instead of one big cutting. For beans, pick every two days or they get tough and stringy. For zucchini, pick when they’re 6–8 inches long.
A giant baseball-bat zucchini tastes watery and has huge seeds. Use sharp scissors or pruners to cut fruit stems instead of yanking and breaking branches. And taste things as you go—a sun-warmed cherry tomato right in the garden is one of life’s simple joys.

Step 13: Keep a Simple Garden Log

You don’t need a fancy journal. A dollar-store notebook and a pen kept near the back door works fine. Write down three things each time you garden: what you planted and when, what you harvested and how much, and any problems you saw (like “white spots on squash leaves” or “beans didn’t sprout well”).
Also note the weather. These notes become incredibly valuable next spring. You’ll remember, “Oh right, I planted tomatoes on May 10 last year and they did great. Let’s do that again.” Or, “The cucumbers in the west bed got mildew, so this year I’ll put them in the east bed.
” Without notes, you rely on memory, and memory fades. With notes, you get smarter every season. Some people even take quick phone photos and add them to a folder labeled “Garden Notes.”

Step 14: Prepare Your Bed for Winter

After frost kills your summer plants, don’t just leave the bed empty and ignore it. Pull out dead plants (unless they look diseased then throw them away, don’t compost). Shake the dirt off roots and put the roots back in the bed. Add a 2-inch layer of compost on top.
You don’t need to mix it in rain and worms will do that over winter. Then cover the soil with a thick mulch of shredded leaves or straw. This protects the soil from heavy rain that washes away nutrients. In spring, just pull back the mulch, and your bed is ready to plant again.
Another winter trick: plant a cover crop like winter rye or clover in late fall. It grows slowly over winter, then you chop it down in spring and dig it in. That adds free organic matter and keeps weeds from taking over.

Step 15: Celebrate Your First Harvest and Plan for Next Year

You did it. You started raised bed gardening from scratch and grew real food. That’s something to be proud of. Now sit down with that garden notebook one more time. Write down what worked: “The basil was amazing.
The tomatoes needed bigger cages.” And what didn’t: “Radishes bolted because it got hot too fast. Next year plant them earlier.” Look at seed catalogs or websites over the winter. Pick one or two new things to try next season, but stick with your favorites too. The best garden is the one you actually enjoy working in.
Don’t let it become a chore. Add another bed if you want, or keep it small and simple. The real goal isn’t a perfect harvest. It’s the quiet satisfaction of stepping outside and picking dinner from a box you built and filled yourself. Now go eat something you grew.

Helpful Sections
Quick Tips for Success
Water deeply but less often. Shallow watering makes roots stay near the top. Instead, give the bed a good soak twice a week (or more if it’s really hot). Stick your finger in the soil if it’s dry two inches down, water. Also, feed your plants every few weeks with a liquid fertilizer like fish emulsion or compost tea.
Granular slow-release fertilizers work too, just follow the label. And here’s a tip nobody tells you: pick vegetables when they’re ready, even if you don’t need them right then. A ripe pepper left on the plant tells the plant to stop making new ones.
Harvesting keeps production going. Finally, keep a simple garden journal. Write down what you planted and when. Next year, you’ll know exactly what worked.
Common Mistakes to Avoid
Mistake number one: using garden soil from your yard. It’s often too dense, full of weed seeds, and may carry diseases. Always use a light, fluffy mix made for containers or raised beds. Mistake two: building a bed wider than four feet.
You’ll step on the soil to reach the middle, which compacts it and hurts roots. Mistake three: ignoring watering during a heat wave. A raised bed dries out faster than the ground. On 90°F days, you might need to water daily. Mistake four: over-fertilizing.
Too much nitrogen gives you giant leaves but no tomatoes. Stick to a balanced fertilizer. Mistake five: planting the same crop in the same spot every year. Rotate your plants (tomatoes where beans were, beans where lettuce was). This keeps pests and diseases confused.
AFQs
How deep should a raised bed be for vegetables? At least 12 inches for shallow-rooted plants like lettuce and herbs. Go 18 inches for carrots, potatoes, or tomatoes. Deeper is always better because roots like to stretch.
Do I need to line the bottom of my raised bed? Not for drainage, yes to block weeds. A layer of cardboard or landscape fabric on the bottom stops grass from growing up. But don’t line the whole inside with plastic—that traps water and rots roots.
How often do I replace the soil? You don’t. Add 2–3 inches of compost every spring and mix it into the top few inches. That refreshes nutrients. Every few years, test your soil pH. It should be between 6.0 and 7.0 for most veggies.
Can I put a raised bed on concrete or a patio? Yes, but make sure it has a bottom (like a planter box) so the soil doesn’t wash out. You’ll also need to water more often because concrete gets hot and dries things out faster.
Simple Designs and Layout Ideas
You don’t need complex plans. For a classic look, build one 4×8 foot rectangle and divide it into four 2×4 foot sections with small sticks. Plant a different crop in each section. That’s called intensive gardening and it works great.
If you have a narrow space like a side yard, build a 2×6 foot bed against a sunny wall. Use a trellis on the back for climbing beans or cucumbers. For a small patio, try a “keyhole garden” a circular bed with a wedge cut out so you can reach the center.
Or just buy two or three small 2×2 foot square beds and arrange them like stepping stones. Paint the outside of the wood with nontoxic milk paint for some color. The best design is the one that fits your space and makes you smile when you walk outside.
Conclusion
Starting a raised bed garden isn’t complicated. Pick a sunny spot, build or buy a simple box, fill it with a good soil mix, and plant a few things you actually like to eat. Water when the top two inches of soil feel dry. Add compost each spring. That’s really it. You will make small mistakes everyone does.
But raised beds forgive a lot. They drain well, they keep weeds down, and they make gardening feel easy instead of like a chore. So go ahead. This weekend, get one bed set up. Plant some radish seeds and a cherry tomato
related post: